

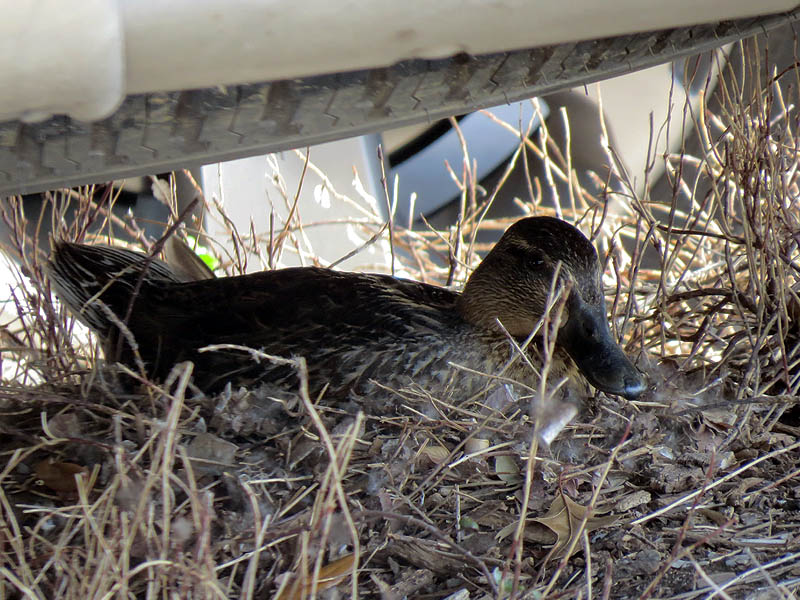
You may remember the unique and unfortunate situation we discovered in Carrollton back in the late spring. A pair of Mallards had made the lamentable decision to build their nest on an island in the middle of a busy parking lot. This created a situation that was almost certainly doomed to failure. From the very moment the ducklings hatched they would be faced with an almost impossible gauntlet of obstacles and dangers.

The parking lot was located many hundreds of yards from the nearest standing body of water. The newborn ducklings would be required to wander far in order to reach the safety and food that the closest pond would provide. The young Mallards need to navigate large swaths of the concrete parking lot just as summertime temperatures were beginning to set in. If they began their trek during peak traffic hours, then many would certainly be run over before they could even make it out of the parking lot.

If the hatchlings did somehow managed to survive the transit of the parking lot, they would then be faced with the need to safely cross a busy six-lane thoroughfare that stood as a near impossible barrier between them and the distant small lake. No matter how we sliced it, their prospects just did not seem good.
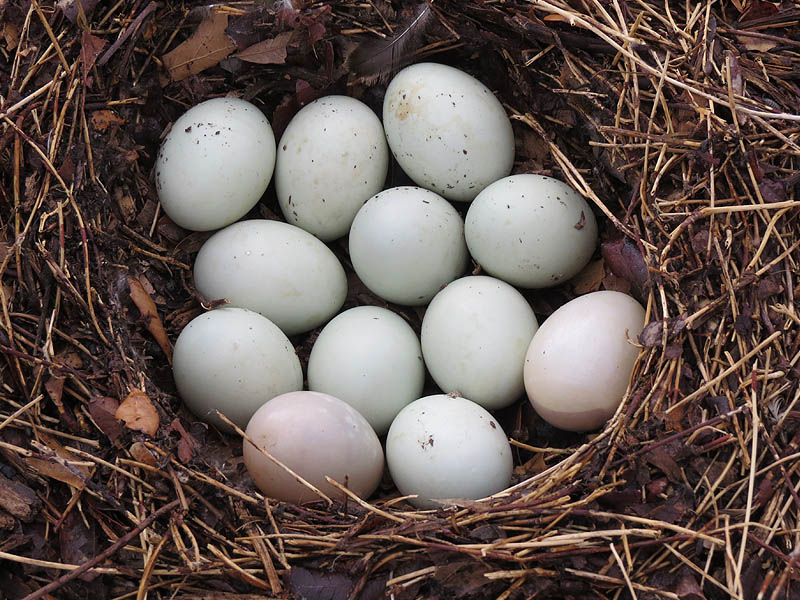
In the end it was decided that intervention was appropriate in this case. A volunteer from a local licensed wildlife rehabilitation facility came out and collected the eggs. The nest was removed as well in order to discourage its reuse.
So, once you have collected a clutch of wild Mallard eggs how do you go about rescuing them? Well, you begin by artificially incubating them—a fascinating process that requires you to carefully reproduce many aspects of the natural process in order to achieve a successful hatching.
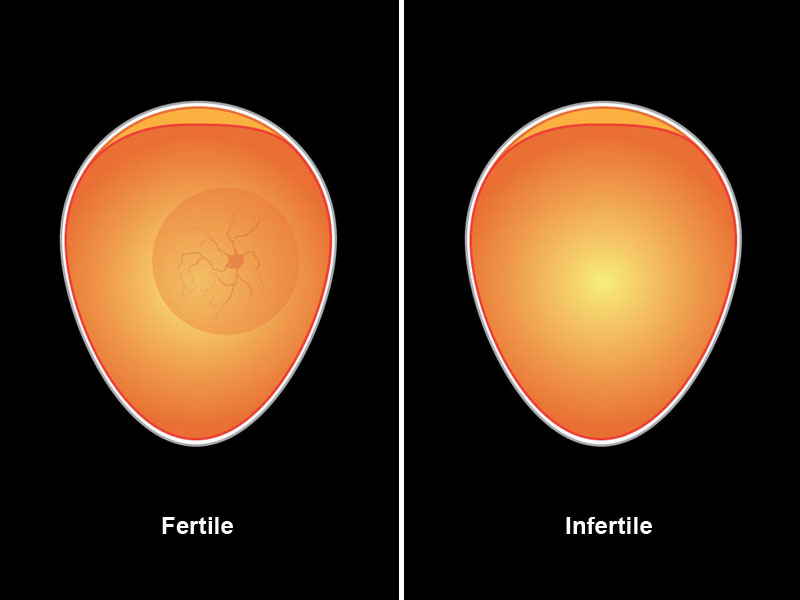
The first step is to determine if the eggs you intend to incubate are viable or not. This is done through a process known as “candling.” This is accomplished by holding a bright light against the egg while in a darkened room. Candling illuminates the interior of the egg and allows you to see important aspects of its structure and development. Even early on it is easy to tell a viable egg from one that has failed or is not fertile.
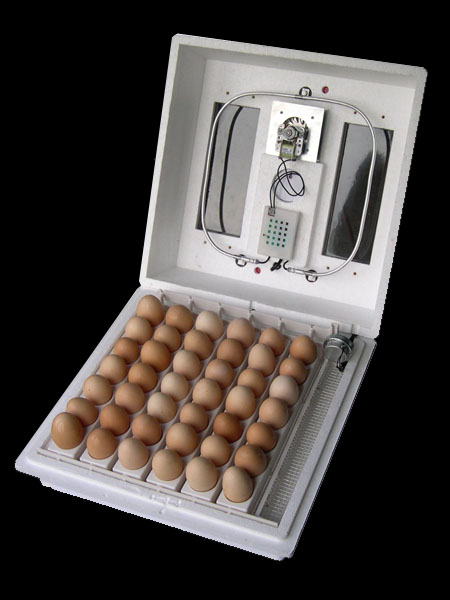
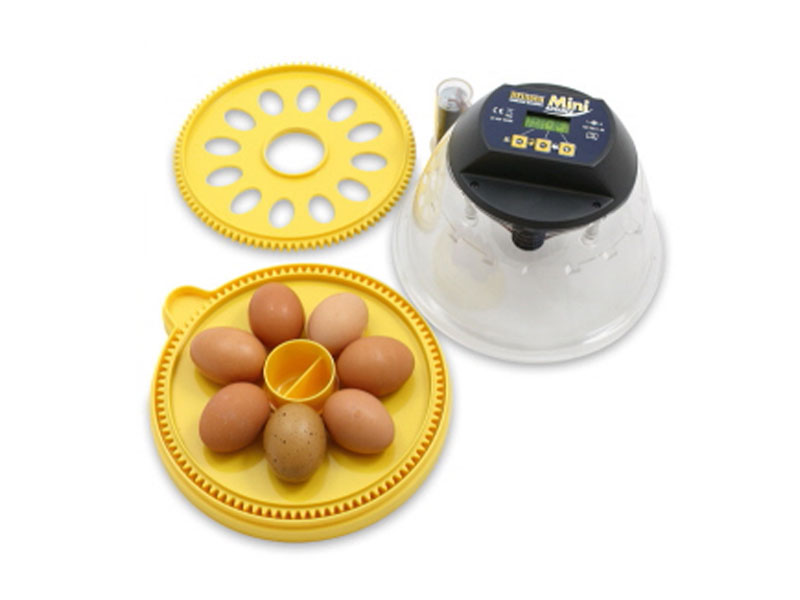
Once a egg is determined to be fertile it can be placed into an artificial incubator. There are many different types of incubators available on the market. There are big cabinet-sized units used for commercial production. There are sophisticated tabletop units available for smaller operations. And there are simple incubators intended for hobbyists or classsrooms that are only designed to handle a few eggs at a time. No mater what their size, all of these incubators have a number of important features in common that I will discuss in more depth later in the article.

Freshly laid eggs can be held for several days at a properly cool temperature before being placed in an incubator. Embryo growth will not occur until the eggs have been warmed sufficiently. The process of warming the eggs to the point that embryo development can proceed is known as incubation, and once it has begun, it cannot be stopped without causing egg failure. Most birds will not begin incubation until the entire clutch has been laid. This is done to ensure that all of the eggs hatch at roughly the same.
The heat required for incubation is normally supplied by the mother and sometimes the father bird. This is why birds sit on their eggs. With birds it is their body heat that supplies the needed warmth, with an artificial incubator it is a heating element and thermostat. Most bird eggs must be incubated at somewhere around 100F. The exact temperature varies depending on the species of bird you are trying to hatch, and mechanical incubators have adjustments that will allow you to set just the right temperature. For Mallards the optimal temperature is somewhere around 98F. Once incubation has begun embryo development progresses rapidly.

There is more to incubating eggs than just keeping them warm, however. Regular egg turning is another important part of the process. In nature this is done by the mother or father bird. Whenever you see a bird standing over a nest fussing with their eggs this is what they are trying to accomplish. It is not unusual for a bird to turn its eggs up to 100 times every 24 hours during incubation.
Turning the eggs promotes good survivability and hatchability. It is thought that regularly rotating eggs during the incubation process helps the embryos develop properly by preventing them from sticking to surrounding membranes and other materials inside the shell. Many artificial incubator units come with mechanical devices and timers to accomplish regular egg turning. On simpler units, without these conveniences, egg rotation must be done manually. Typically, eggs are marked with an “X” on one side and an “O” on the other to help the caregiver keep track of the turning status. Hourly egg rotations are deemed optimal, but as few as three a day can be adequate.
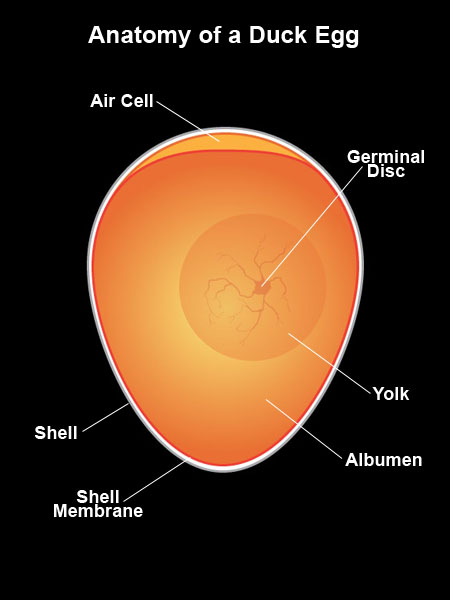
The final consideration when artificially incubating eggs is humidity control. Humidity is important because it controls the size and growth of the air cell at the wide end of the egg. This air cell provides a place where the emerging young bird can begin to peck its way out of the eggshell. If this air pocket is too small the baby bird will drown in the egg fluids as it begins the process of hatching. If the air cell is too large the interior of the egg will dry out during hatching, effectively gluing the young bird inside the shell.
For Mallards the optimal humidity level has been determined to be around 84% percent during most of the incubation period. It is advisable to raise the humidity level in the last several days before hatching in order to ease the hatching process—once the air cell has reached an adequate size the added moisture helps to ensure that the emerging baby does not become stuck in drying fluids during the hatching process.
You might wonder how humidity is controlled by birds in the wild. They accomplish this task by simply wetting their feathers when away from the nest. When they return to the nest and begin setting the eggs again the moisture in the their plumage raises the humidity around the eggs. How the birds judge the right amount of moisture to bring back to the nest for optimal humidity control is beyond me!
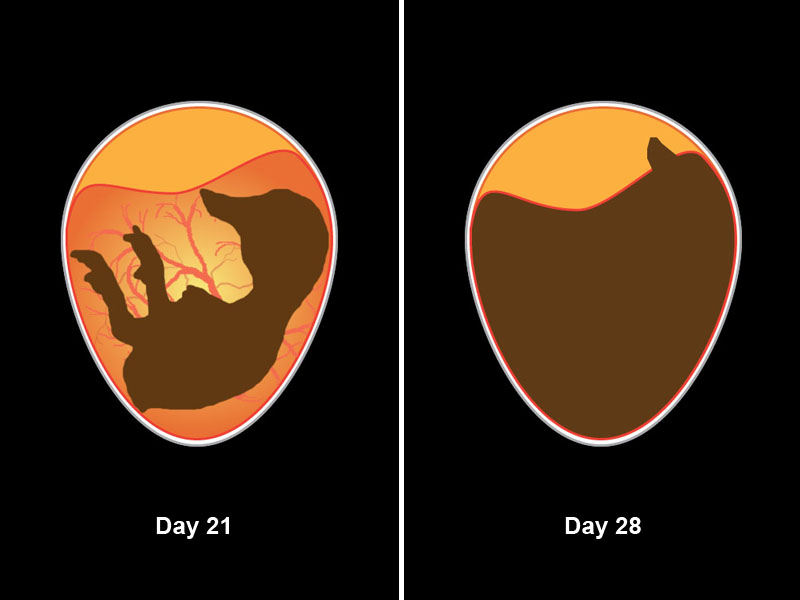
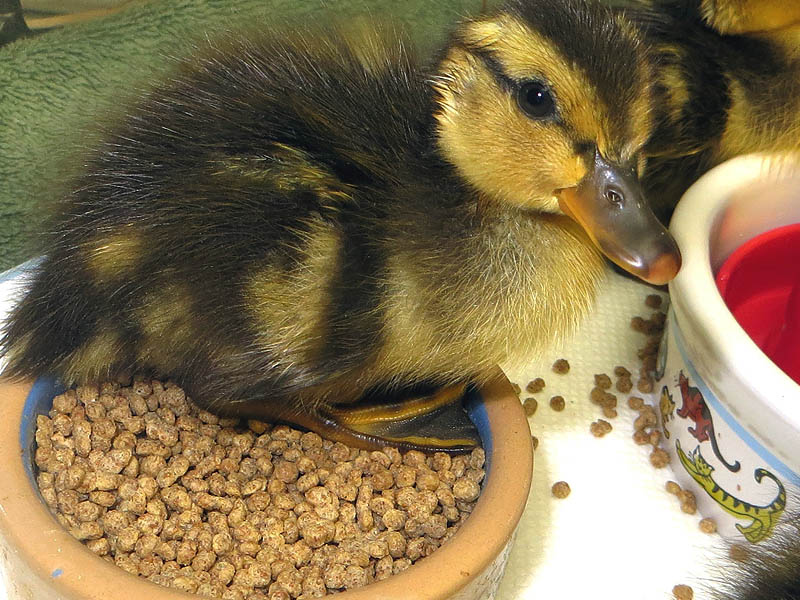
Incubation time frames vary from one species of bird to another. For Mallards about 28 days is typical. When the eggs in the collected clutch were candled at the rehabilitation center, it was determined that they were about 21 days along. That meant they they would only need to be artificially incubated for approximately one week before they would hatch. Once hatched, Mallard ducklings are capable of feeding and watering themselves—a characteristic that makes them relatively easy to care for. Our prospects for success looked good!
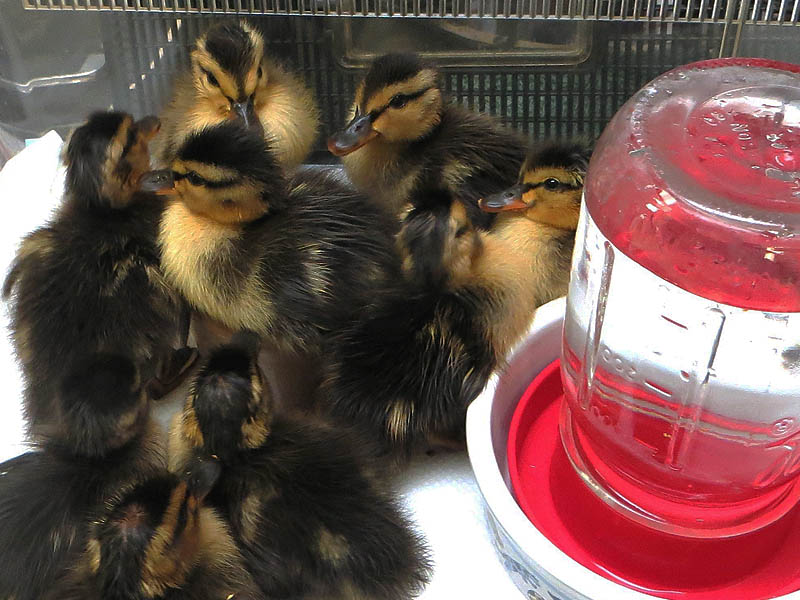
Sure enough, the following weekend the eggs began to hatch. Once pipping of the eggshell begins the actual hatching process can take up to three days to complete. The young ducklings chirp to each other during this time as a form of encouragement.
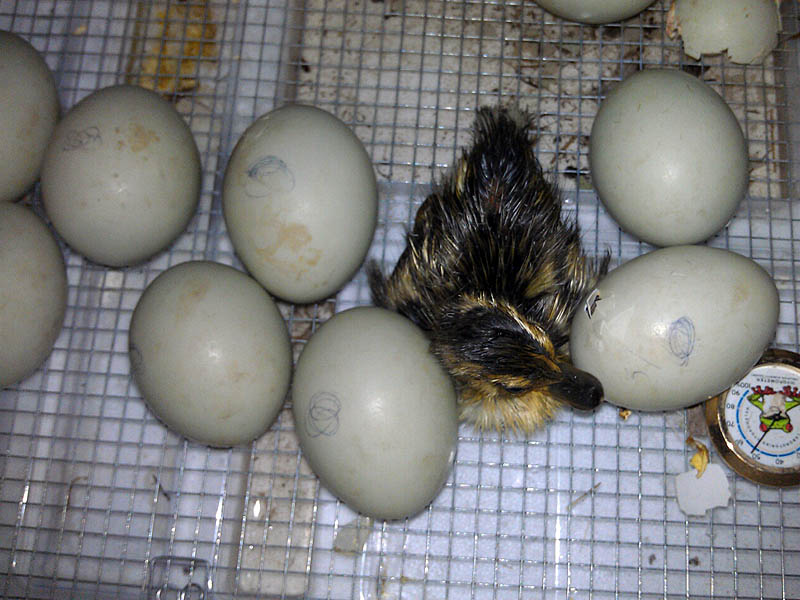
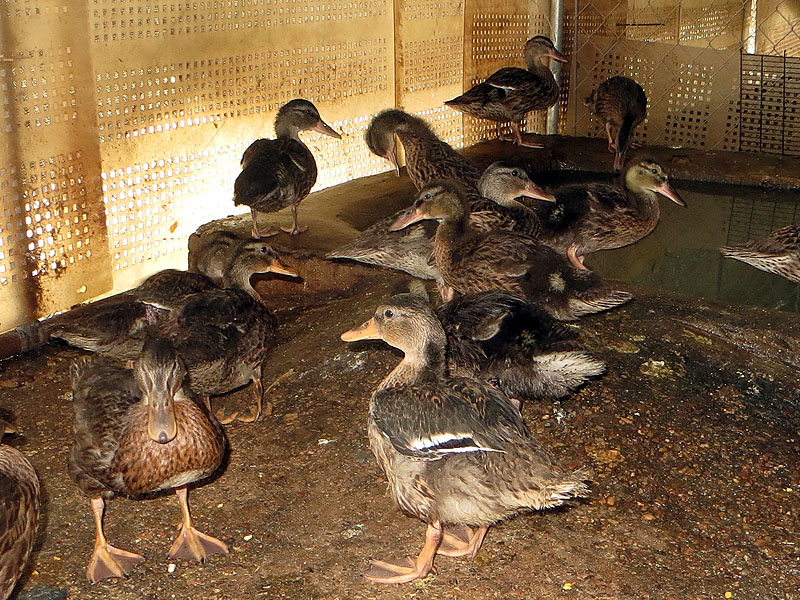
By early the next week all ten of the eggs had hatched successfully. That was right around two months ago. The ducklings are nearly grown now—we are just waiting for their flight feathers to come in fully. Soon, the entire group will be released back into the wild at a location where they can be protected to a degree until they are ready to leave on their own.


Only US Fish & Wildlife-permitted wildlife rehabilitators should remove Mallard eggs from a nest.
Yes, Bonnie is correct. The eggs mentioned in this post were collected by a permitted rehabber. This article is meant solely to illustrate the process of artificially incubating eggs. It should not be interpreted as instructions or encouragement to attempt something like this if you do not hold the proper permits.